Pickled Quail Egg & Prosciutto Roll

I’m “wrapping up” the On A Roll homemade sushi series today with a little bonus roll – pickled quail egg & prosciutto roll with mustard greens.

This one is definitely not vegetarian or vegan, but it is unique and it is delicious!

Pickled Quail Eggs?? 😳

When I moved to South Louisiana back in 2003, I quickly adopted several regional foods – crawfish, boudin, red beans and rice and these babies.

pickled quail eggs

You can soak pretty much anything in vinegar and spice and it’s gonna be good.

What Do You Do With Them?

I guess they are considered a snack? I learned to eat them with Frito’s Scoops and whipped cream cheese.

I’ve topped red beans and rice with them.

My bff Melonie taught me to put them on top of gumbo 🙂

For a picnic last year, I made pickled quail egg salad and served it on snazzy crackers – it was a big hit.

pickled quail egg salad picnic
Besties at an outdoor symphony picnic where I debuted pickled quail egg salad

If you understand the addiction and have a favorite way to eat them, please share in the comments below!

Pickled Quail Eggs In sushi?

For the sushi roll, I chose to add a couple slices of prosciutto that needed using up. Ham always goes well with eggs. Also had an unbelievable amount of mustard greens from my garden that wanted attention so I added those. You could sub arugula.

If you can’t find pickled quail eggs (then you don’t live in South Louisiana) you could make your own. Martha Stewart has a recipe for adorable beet-pickled version.

Click image to jump to Martha Stewart’s beet-pickled quail egg recipe

You can use your extra eggs to make the pickled quail egg salad. Just diced up the eggs, toss in some finely chopped celery and a little mayo.

You Can Do This

I hope you’ve been inspired enough by now to try making sushi at home. Visit the On A Roll series page to see all the recipes in one place. Time to plan a party!

Frittata will be back to posting normal food later this week…it’s springtime here in the south so subscribe below to make sure you don’t miss any fresh ideas.

This one’s for you Melonie!!

Follow Frittata

Pickled Quail Egg and Prosciutto Roll

This one is for my friends in South Louisiana who understand the addictiveness of pickled quail eggs.
Prep Time: 30 minutes
Cook Time: 30 minutes
Total Time: 45 minutes
Course: Main Course
Cuisine: Asian
Keyword: mustard greens, prosciutto, sushi
Servings: 2 rolls
Calories: 327kcal

Equipment

  • sushi mat wrapped in plastic wrap plus extra plastic wrap for cutting

Ingredients

Sushi Quinoa Rice

  • 3/4 cup sushi rice, rinsed several times
  • 1/4 cup uncooked quinoa, rinsed (tri-color is prettiest!)
  • 1 cups water
  • 3 tbsp rice wine vinegar
  • 1 tsp sugar
  • salt
  • 1 tbsp sesame seeds

Filling

  • 3 pickled quail eggs, sliced
  • 2 slices prosciutto
  • 1/2 cup mustard greens, thinly sliced (sub arugula)
  • 2 tsp juice from pickled quail eggs
  • 2 sheets nori
  • 1/2 avocado, thinly sliced
  • soy sauce for dipping
  • wasabi paste, optional

Instructions

Prepare the Sushi Quinoa Rice

  • Place the rinsed sushi and quinoa in a small saucepan. Add 1 cups water and place over med-high heat. As soon as bubbles start to form on the edges, stir to remove anything that is sticking and cover with a lid. Reduce heat to medium-low. Cook for 15 minutes and then turn off heat (don't open the lid). Allow to steam for another 15 minutes. Remove lid, fluff with fork. Add rice vinegar, sugar, salt and sesame seeds and fluff again. Set aside.

Preparing the Roll

  • While rice is cooking, prep your filling ingredients.
  • Once rice is done, place one nori sheet (bumpy side up) on a sushi rolling mat that has been wrapped in plastic wrap. Using a fork or wet fingers, press cooked sushi quinoa rice onto the mat firmly leaving 1 inch of nori uncovered. Carefully pick up the nori and flip over.
  • Start layering filling ingredients on the section of nori opposite where the rice begins on the other side but closest to the nori edge that you left without rice. You are going to roll that uncovered nori around the filling to get it started. Eggs first, then prosciutto and greens. Drizzle the 2 tsps of juice from the pickled quail egg jar over the greens. **You are going to make 2 rolls so use about half your filling ingredients on each.
  • Pick up the edge of your rolling mat and start to flip the exposed piece of nori over the filling ingredients. You essentially want to tuck that piece around and under to get your roll sealed. Use the mat to pull it back towards you, and use your fingers to pinch the roll firmly as you go. You want to get things tight on that first turn and then continue rolling about a half turn at a time, pulling the mat free as you continue to roll forward and continuing to pinch along the length of the roll as you go. Unroll the mat and you should have a beautiful sushi roll!
  • Carefully transfer your roll to a cutting board. Drape the avocado slices over the top of the roll before slicing. Follow instructions below.
  • The hardest part IMO is cutting. Move the roll to a cutting board. I use a separate piece of plastic wrap which I lay over the top, pull snug and tuck in slightly all around (some people fully wrap the roll before cutting but I found that left me with shreds of plastic wrap to pick off). Using a serrated knife, gently cut your sushi into pieces and then carefully remove the plastic wrap. Stand back to admire what you've created, then go ahead and make your second roll. Serve immediately or keep wrapped in plastic and refrigerated until ready to serve.
  • Serve 1 roll per person with soy sauce for dipping and wasabi paste on the side (optional).

Notes

Quail eggs are one of the many things that get put in a jar and pickled here in the south.  They are eaten as a snack (I think?).  I like them with Frito’s scoops and cream cheese.
My friend Melonie taught me to slice them and put them on top of gumbo and rice or red beans and rice.  
This one’s for you Mel!

Nutrition

Serving: 1roll | Calories: 327kcal | Carbohydrates: 31g | Protein: 7g | Fat: 21g | Saturated Fat: 4g | Trans Fat: 1g | Cholesterol: 18mg | Sodium: 78mg | Potassium: 634mg | Fiber: 9g | Sugar: 3g | Vitamin A: 718IU | Vitamin C: 21mg | Calcium: 81mg | Iron: 2mg
Tried this recipe?Let us know how it was!

Kimchi, Tofu and Sesame Noodle Roll

The kimchi sushi roll is the final vegetarian/vegan recipe in my homemade sushi On A Roll series (spoiler alert – the final recipe coming up next is not vegetarian or vegan).

How This Party Got Started

Inspiration for trying to make sushi at home came from a vegan kimchi sushi roll I got at the farmer’s market (On A Roll – Homemade Sushi).

It was made with kimchi and tempeh. I thought this was such a great idea – and it was amazingly delicious – but it was a one-time thing.

Kimchi sushi roll

Kimchi Sushi Dreams

I have been fantasizing about that kimchi sushi roll since I tried it.

I had planned to make a kimchi roll first. Of course, when the inspiration and energy hit me to start this project, I was out of kimchi.

I’m lucky that there is a Korean family selling fabulous spicy kimchi at my local farmer’s market. Fermented treats are plentiful these days though so you can certainly get kimchi at any grocery store.

What the heck is kimchi?

Not familiar with kimchi yet? Kimchi is a staple in Korean cooking. This is probably not the perfect comparison but it’s kind of like the Korean version of coleslaw. It’s made with cabbage and other vegetables that are salted and fermented. Anyone who loves vinegar and vinegar-based salads will love kimchi.

kimchi
kimchi

What Else To Do With Kimchi

You’re not going to be using very much kimchi to make 2 kimchi sushi rolls. So what else can you do with it?

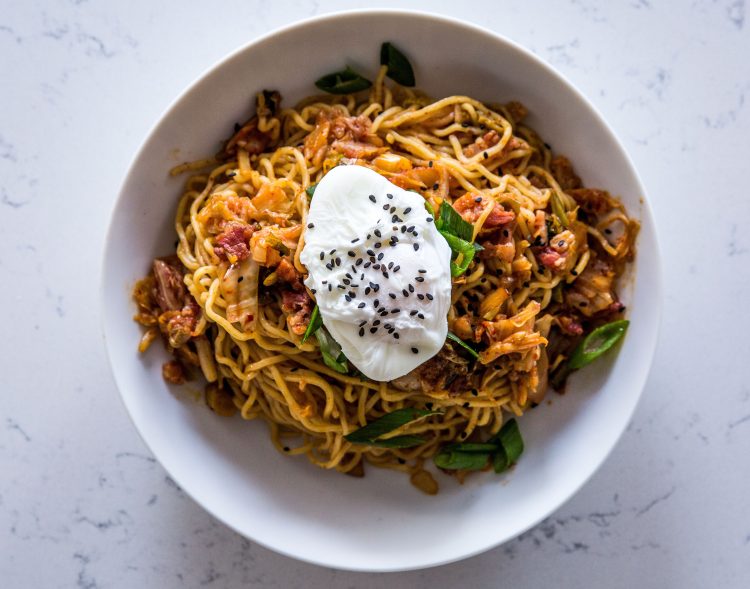
When kimchi first showed up at my famer’s market I bought it and then had no idea what to do with it either. I found Crazy Fast Ramen with Bacon, Egg and Kimchi on Bon Appetit’s website. It is super easy. Especially if you skip the bacon. I only use the bacon if I have some already made. It’s a super easy but impressive dinner that I make all the time.

Crazy Fast Ramen with Bacon, Egg and Kimchi

The ramen is a recipe I featured on my Something Borrowed page (for recipes that aren’t mine).

For the kimchi sushi roll, I wanted to put something more savory with the kimchi and something to add protein. Decided to use tofu instead of tempeh simply because I had a package open. But I needed something else. Got to thinking about the ramen recipe and decided that putting sesame noodles in the roll just might work.

I used half of a quality brown-rice ramen noodle cake which was the perfect amount for 2 sushi rolls. Cooked them as directed and tossed with sesame oil, soy sauce, ginger and sesame seeds.

sesame ramen noodles

Then I rolled the noodles up with kimchi, tofu, avocado and green onions. It was freaking delicious. I’m considering trying to convince my local sushi restaurant to offer it as a special.

Tip: Take a second to heat the noodles up nice and hot before you make the roll and then serve immediately. So if you are making more than one kind of sushi roll, prepare your noodles but roll this one last.

There is one more roll to share before I “wrap up” this series so be sure to subscribe below. You don’t want to miss this last one, especially if you live in South Louisiana!

Follow Frittata

Kimchi, Tofu and Sesame Noodle Roll

A vegetarain sushi roll featuring spicy kimchi, tofu and sesame ramen noodles.
Prep Time: 30 minutes
Cook Time: 30 minutes
Total Time: 45 minutes
Course: Main Course
Cuisine: Asian, Vegan, Vegetarian
Keyword: kimchi, ramen, sushi, tofu
Servings: 2 rolls
Calories: 244kcal

Equipment

  • sushi mat wrapped in plastic wrap plus extra plastic wrap for cutting

Ingredients

Sushi Quinoa Rice

  • 3/4 cup sushi rice, rinsed several times
  • 1/4 cup uncooked quinoa, rinsed (tri-color is prettiest!)
  • 1 cups water
  • 3 tbsp rice wine vinegar
  • 1 tsp sugar
  • salt
  • 1 tbsp sesame seeds

Filling

  • 1/2 pkg quality ramen noodles
  • 1 tsp sesame oil
  • 1 tbsp soy sauce
  • 1/2 tsp grated ginger
  • 1/4 cup tofu (2 1/2 inch x 1/2 inch slices)
  • 1/4 cup kimchi
  • 1/4 avocado, thinly sliced
  • 1 tbsp green onions, diced
  • 2 sheets nori
  • soy sauce for dipping
  • wasabi paste, optional

Instructions

Prepare the Sushi Quinoa Rice

  • Place the rinsed sushi and quinoa in a small saucepan. Add 1 cups water and place over med-high heat. As soon as bubbles start to form on the edges, stir to make sure nothing is sticking and cover with a lid. Reduce heat to medium-low. Cook for 15 minutes and then turn off heat (don't open the lid). Allow to steam for another 15 minutes. Remove lid, fluff with fork. Add rice vinegar, sugar, salt and sesame seeds and fluff again. Set aside.

Preparing the Roll

  • While rice is cooking, prep your filling ingredients. Cook 1/2 ramen noodle cake as directed. Drain and return to warm pot. Add sesame oil, soy sauce and ginger. Stir to combine and set aside.
  • Once rice is done, place one nori sheet (bumpy side up) on a sushi rolling mat that has been wrapped in plastic wrap. Using a fork or wet fingers, press cooked sushi quinoa rice onto the mat firmly leaving 1 inch of nori uncovered. Carefully pick up the nori and flip over.
  • Start layering filling ingredients on the section of nori opposite where the rice begins on the other side but closest to the nori edge that you left without rice. You are going to roll that uncovered nori around the filling to get it started. Noodles first, then tofu, kimchi, avocado and green onions. **You are going to make 2 rolls so use about half your filling ingredients on each.
  • Pick up the edge of your rolling mat and start to flip the exposed piece of nori over the filling ingredients. You essentially want to tuck that piece around and under to get your roll sealed. Use the mat to pull it back towards you, and use your fingers to pinch the roll firmly as you go. You want to get things tight on that first turn and then continue rolling about a half turn at a time, pulling the mat free as you continue to roll forward and continuing to pinch along the length of the roll as you go. Unroll the mat and you should have a beautiful sushi roll!
  • The hardest part IMO is cutting. Move the roll to a cutting board. I use a separate piece of plastic wrap which I lay over the top, pull snug and tuck in slightly all around (some people fully wrap the roll before cutting but I found that left me with shreds of plastic wrap to pick off). Using a serrated knife, gently cut your sushi into pieces and then carefully remove the plastic wrap. Stand back to admire what you've created, then go ahead and make your second roll. Serve immediately or keep wrapped in plastic and refrigerated until ready to serve.
  • Serve 1 roll per person with soy sauce for dipping and wasabi paste on the side (optional).

Notes

This is one of my favorite sushi recipes.  Use half a dry ramen cake and cook as directed.  This will give you enough noodles for 2 rolls.  If you like these flavors, you’ll love Crazy Fast Ramen with Bacon and Kimchi which is on my Something Borrowed page.

Nutrition

Serving: 1roll | Calories: 244kcal | Carbohydrates: 36g | Protein: 6g | Fat: 8g | Saturated Fat: 2g | Sodium: 949mg | Potassium: 142mg | Fiber: 2g | Sugar: 3g | Vitamin A: 169IU | Vitamin C: 2mg | Calcium: 61mg | Iron: 2mg
Tried this recipe?Let us know how it was!

Tahini-Kale Vegetarian Sushi Roll

Round 4 of my On A Roll vegetarian/vegan sushi series is the Tahini Roll featuring a healthy amount of lemony tahini-kale salad paired with tofu and roasted red peppers. Don’t skip the sesame seeds in the kale salad!

Keep It Skinny

My first tip for making homemade sushi this week is to focus on keeping the rice layer thin. It’s easy to slap a lot of rice on in order to cover the nori but if you use wet fingers and carefully pack and push the rice into a thin layer, you’ll get a better result.

Tip #2 is to go easy on the filling ingredients. While it seems tempting to load up, you’ll end up with a roll too big for a single bite. It’s a pet peeve of mine when sushi restaurants serve rolls that are too big to eat easily in one bite.

I’ve figured out that you only need to cover about 3/4 of the nori sheet. You just leave more exposed and use that naked piece to get the roll nice and tight. Think of the rice as just the final step in the roll.

Keep the rice layer thin and just enough for one complete turn when rolling.

Kale Salad Leftovers

Since you are only using a tiny bit of your beautiful kale in your Tahini Roll, you might as well make a larger batch of the tahini-kale salad. Take it for lunch this week. Kale is hearty enough to stand up to the lemon-tahini dressing for days without getting soggy. Throw some chickpeas on top and some pumpkin seeds.

Or, you can check out these kale recipes:

There are more vegan/vegetarian sushi rolls coming up in this series. Subscribe below to make sure you don’t miss them! To see them all in one place, visit my Recipe Collections page.

Follow Frittata

tahini-roll

Tahini-Kale Salad Roll

A vegan sushi roll featuring tahini-marinated kale, roasted red peppers and tofu wrapped in a quinoa-sushi rice.
Prep Time: 30 minutes
Cook Time: 30 minutes
Total Time: 45 minutes
Course: Main Course
Cuisine: Asian, Vegan, Vegetarian
Keyword: kale, sushi, tahini, tofu
Servings: 2 rolls
Calories: 376kcal

Equipment

  • sushi mat wrapped in plastic wrap plus extra plastic wrap for cutting

Ingredients

Sushi Quinoa Rice

  • 3/4 cup sushi rice, rinsed several times
  • 1/4 cup uncooked quinoa, rinsed (tri-color is prettiest!)
  • 1 cups water
  • 3 tbsp rice wine vinegar
  • 1 tsp sugar
  • salt
  • 1 tbsp sesame seeds

Filling

  • 1 tbsp tahini
  • 2 tbsp fresh lemon juice
  • 2 tbsp water
  • 1 cup kale, thinly sliced
  • salt and pepper
  • 1 tsp sesame seeds
  • 1/2 slice tofu, cut into 1/2 inch slices
  • 1 roasted red pepper (from the jar), sliced
  • 1/4 cucumber, peeled and cut into matchsticks
  • 1/2 avocado, thinly sliced
  • 2 sheets nori
  • soy sauce for dipping
  • wasabi paste, optional

Instructions

Prepare the Sushi Quinoa Rice

  • Place the rinsed sushi and quinoa in a small saucepan. Add 1 cup water and place over med-high heat. As soon as bubbles start to form on the edges, stir to release anything sticking and cover with a lid. Reduce heat to medium-low. Cook for 15 minutes and then turn off heat (don't open the lid). Allow to steam for another 15 minutes. Remove lid, fluff with fork. Add rice vinegar, sugar, salt and sesame seeds and fluff again. Set aside.

Preparing the Roll

  • While rice is cooking, prep your filling ingredients. In a small mixing bowl whish together the tahini, lemon juice and water. Add kale and sesame seeds, toss well to combine. Season with salt and pepper.
  • Once rice is done, place one nori sheet (bumpy side up) on a sushi rolling mat that has been wrapped in plastic wrap. Using a fork or wet fingers, press cooked sushi quinoa rice onto the mat firmly leaving 1 inch of nori uncovered. Carefully pick up the nori and flip over.
  • Start layering filling ingredients on the section of nori opposite where the rice begins on the other side but closest to the nori edge that you left without rice. You are going to roll that uncovered nori around the filling to get it started. Tofu first, then roasted red pepper strips, cucumber and avocado. Top with kale salad. **You are going to make 2 rolls so use about half your filling ingredients on each.
  • Pick up the edge of your rolling mat and start to flip the exposed piece of nori over the filling ingredients. You essentially want to tuck that piece around and under to get your roll sealed. Use the mat to pull it back towards you, and use your fingers to pinch the roll firmly as you go. You want to get things tight on that first turn and then continue rolling about a half turn at a time, pulling the mat free as you continue to roll forward and continuing to pinch along the length of the roll as you go. Unroll the mat and you should have a beautiful sushi roll!
  • The hardest part IMO is cutting. Move the roll to a cutting board. I use a separate piece of plastic wrap which I lay over the top, pull snug and tuck in slightly all around (some people fully wrap the roll before cutting but I found that left me with shreds of plastic wrap to pick off). Using a serrated knife, gently cut your sushi into pieces and then carefully remove the plastic wrap. Stand back to admire what you've created, then go ahead and make your second roll. Serve immediately or keep wrapped in plastic and refrigerated until ready to serve.
  • Serve 1 roll per person with soy sauce for dipping and wasabi paste on the side (optional).

Notes

Feel free to make a larger portion of the tahini kale and keep in the fridge for tomorrow’s lunch salad.  

Nutrition

Serving: 1roll | Calories: 376kcal | Carbohydrates: 36g | Protein: 11g | Fat: 23g | Saturated Fat: 3g | Sodium: 310mg | Potassium: 793mg | Fiber: 9g | Sugar: 4g | Vitamin A: 2036IU | Vitamin C: 46mg | Calcium: 130mg | Iron: 3mg
Tried this recipe?Let us know how it was!

Put Ireland On The Table

Irish food ideas for St. Patty’s Day & Inspiration to start planning that trip to Ireland you’ve always dreamed of.

I was getting the first pedicure I’ve had in a year over the weekend and I overheard (eavesdropped) a conversation about what kind of Irish food to make for a St. Patrick’s Day dinner party.

It was an Irish Blessing. I didn’t even realize it was almost St. Patty’s Day!

You know I couldn’t wait to jump out of my chair to offer my unsolicited opinion on what Irish food to make. 😚

So I’m forced to interrupt the vegan/vegetarian homemade sushi series to bring you some meat n potatoes.

And a little Ireland travel inspiration.

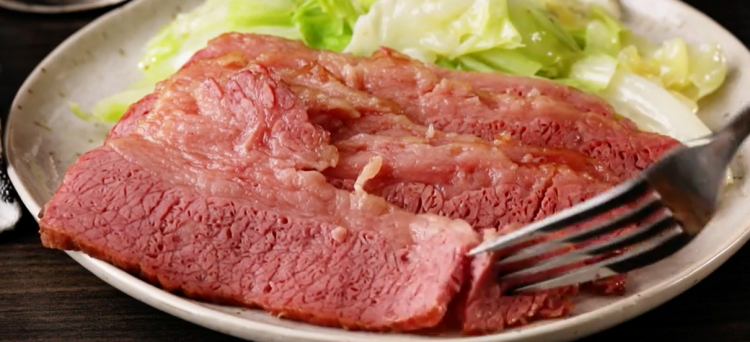
Corned Beef, not Beets

So this is a big departure from yesterday’s post on a Wasabi Beet, Cucumber and Avocado Sushi.

This post is not about convincing you to try corned beef if you already have strong feelings against it. Stay tuned. There are plenty of good Irish food dishes besides the beef.

Slow Cooker Corned Beef from Delish.com

I’m not posting my own recipe for corned beef and cabbage. Click the image above for a nice, easy recipe from delish.com for corned beef using your slow cooker.

Here’s another one that I’ve used and loved. 3 ingredients: corned beef, brown sugar, beer.

Guinness in and of itself is an Irish Blessing.

Guinness Corned Beef on Allrecipes.com

All About The Sides

For St. Patrick’s day I usually make the corned beef by itself. Might throw some carrots in towards the end of the boiling or roasting time. But for the cabbage and potatoes? Try colcannon, a classic on the Irish food menu.

Colcannon recipe from Bon Appetit

There are as many different ways to make colcannon as there are sheep in Ireland. But this is my go-to recipe from Bon Appetit. Click the image to jump to that recipe.

I’ve made it with cabbage as directed. I’ve also made it substituting roasted brussel sprouts instead.

Yep. That counts as cabbage. Do what you want. Colcannon is all about the potatoes and the butter.

Sopping Up The Goodness

You’ll find Irish soda bread in stores around this time of year. Just keep walking. I promise you this is the recipe you want. This recipe is not dry like many soda breads but has the yeasty flavor and crumble that you want.

Irresistible Irish Soda Bread on Allrecipes.com

I throw a handful of dried cranberries into the batter before baking. It makes the bread gorgeous and adds a little bite of sweetness.

And For Dessert?

There is only one answer.

Guinness Chocolate Pudding.

Guinness Chocolate Mousse cups for two from Chocolatemoosey.com

I had a great recipe for this in an Irish cookbook that I lost in the divorce but this looks like the same recipe. Takes a little effort because you have to whip the eggs whites but it is so worth it.

Wash It All Down

The wonderful thing about Irish food is everything tastes good with Guinness. As with corned beef, I’m not here to convert you if you don’t like Guinness. The rest of us will drink yours.

“Everything Goes With Guinness”

Time To Plan That Trip

I bet while you’re enjoying your St. Patrick’s Day meal someone says, “We should go to Ireland.”

Here at Once Upon A Frittata, things tend to be very food-focused. But travel is an important part of any balanced diet.

Yes. You should go to Ireland. And since it is safe to start dreaming of travel again, it’s also a good time to start the planning.

Ugh. I Hate Trip Planning. But I Really Want To Go

Good thing you are Following Frittata! I already planned your trip. Actually, Rick Steves did. I just followed his itinerary and added the pictures and tips to make it even easier.

JennyG does Tree Pose at Cliffs of Moher

Inspiration for Ireland

Ready To Go?

Check out my Ireland travel page. It’s time!

I leave you with this Irish Blessing courtesy of my dear friend, Scott Boagni.

Here’s to a long life, and a merry one,

A quick death, and an easy one,

A pretty girl and an honest one,

A cold beer. And another one.

Scott Boagni

Follow Frittata

Wasabi Beet, Cucumber and Avocado Sushi Roll

Welcome to Part 3 of my On A Roll vegetarian/vegan sushi roll series!

Dying to know if anyone has been inspired to try making sushi at home for the first time. Comment below!

Still working up the courage? Keep reading for instructions from a beginner’s point of view.

Feeling the Beet

Wasabi Beet, Cucumber and Avocado Sushi Roll

This week’s roll features pre-cooked beets which are usually available in the produce section. Using pre-cooked beets saves a ton of time, but feel free to roast or boil beets yourself.

I used wasabi paste for this roll to spice things up. I love that you can get wasabi paste in a tube ready to use. One less thing to prepare.

Decided some cool cucumber and avocado were the right compliments to the wasabi and beets. I also had fresh dill which goes well with beets and provides a little freshness.

In addition to the crunchy cucumber, I thought it might be nice to have a little bonus crunch so I added some chopped pistachios. Not totally convinced it added anything so feel free to leave that out if you don’t have them handy.

Slow Your Roll

I decided to try rolling without a sushi mat. After reading online about what to use if you don’t own a sushi mat, I decided to try a linen placemat.

Rolling with just plastic wrap was easier than using a mat

I just laid the plastic wrap on top vs. trying to wrap a placemat in cling wrap.

The verdict? I ended up not even using the placemat.

Way easier and less mess to just roll with the plastic wrap.

Stop, Drop and Roll

Pick up the plastic wrap enough so you can get the edge of the nori with your fingers. over the filling. Drop the plastic wrap back down and use your fingers to essentially tuck that naked strip of nori around and under the ingredients.

Now lift up the edge of plastic wrap closest to you again and pull it up and over the roll extending the edge to the opposite side of your mat and let it go. Crimp the roll with your hands, pulling the roll back towards you to make it tight. This is the most important part on the first turn!

Pick up the far edge of plastic again and pull forward to release it from the roll. Roll forward and repeat.

Keep crimping the whole thing (especially the edges) with your hands as you go.

It makes sense when you start doing it 😬

Nice Slice

Carefully move your roll to a cutting board. Use the same piece of plastic wrap to hold it steady and firm while you cut. I’m still sold on using a serrated knife for this. Be patient and gentle or you will tear it up.

Gently pull off your plastic wrap and then smile because you just made homemade sushi 😎

I’ve got 2 more rolls left for the series so don’t forget to subscribe below to make sure you don’t miss the next recipe!

Follow Frittata

Wasabi Beet, Cucumber and Avocado Roll

A vegan sushi roll featuring beets, cucumber and avocado, a hit of wasabi. Add chopped pistachios for a bonus crunch.
Prep Time: 30 minutes
Cook Time: 30 minutes
Total Time: 45 minutes
Course: Main Course
Cuisine: Asian, Vegan, Vegetarian
Keyword: beets, dill, pistachios, sushi
Servings: 2 rolls
Calories: 305kcal

Equipment

  • sushi mat wrapped in plastic wrap plus extra plastic wrap for cutting

Ingredients

Sushi Quinoa Rice

  • 3/4 cup sushi rice, rinsed several times
  • 1/4 cup uncooked quinoa, rinsed (tri-color is prettiest!)
  • 1 cups water
  • 3 tbsp rice wine vinegar
  • 1 tsp sugar
  • salt
  • 1 tbsp sesame seeds

Wasabi Beet Filling

  • 1/2 tsp wasabi paste
  • 1 small cooked beet (usually available in produce section) cut into matchsticks
  • 1/2 slice cucumber, peeled and cut into matchsticks
  • 1/4 avocado, thin sliced
  • 1 tsp chopped fresh dill
  • 1 tbsp chopped pistachios, optional
  • squeeze lemon juice
  • 2 sheets nori
  • soy sauce for dipping

Instructions

Prepare the Sushi Quinoa Rice

  • Place the rinsed sushi and quinoa in a small saucepan. Add 1 cup water and place over med-high heat. As soon as bubbles start to form on the edges, stir to release anything sticking and cover with a lid. Reduce heat to medium-low. Cook for 15 minutes and then turn off heat (don't open the lid). Allow to steam for another 15 minutes. Remove lid, fluff with fork. Add rice vinegar, sugar, salt and sesame seeds and fluff again. Set aside.

Preparing the Roll

  • While rice is cooking, prep your filling ingredients.
  • Once rice is done, place one nori sheet (bumpy side up) on a sushi rolling mat that has been wrapped in plastic wrap. Using a fork or wet fingers, press cooked sushi quinoa rice onto the mat firmly leaving 1 inch of nori uncovered. Carefully pick up the nori and flip over.
  • Spread wasabi paste on the section of nori opposite where the rice begins on the other side but closest to the nori edge that you left without rice. You are going to roll that uncovered nori around the filling to get it started. Layer beets, cucumber and avocado. Sprinkle with dill and pistachios (if using). Finish with a squeeze of fresh lemon juice. **You are going to make 2 rolls so use about half your filling ingredients on each.
  • Pick up the edge of your rolling mat and start to flip the exposed piece of nori over the filling ingredients. You essentially want to tuck that piece around and under to get your roll sealed. Use the mat to pull it back towards you, and use your fingers to pinch the roll firmly as you go. You want to get things tight on that first turn and then continue rolling about a half turn at a time, pulling the mat free as you continue to roll forward and continuing to pinch along the length of the roll as you go. Unroll the mat and you should have a beautiful sushi roll!
  • The hardest part IMO is cutting. Move the roll to a cutting board. I use a separate piece of plastic wrap which I lay over the top, pull snug and tuck in slightly all around (some people fully wrap the roll before cutting but I found that left me with shreds of plastic wrap to pick off). Using a serrated knife, gently cut your sushi into pieces and then carefully remove the plastic wrap. Stand back to admire what you've created, then go ahead and make your second roll. Serve immediately or keep wrapped in plastic and refrigerated until ready to serve.
  • Serve 1 roll per person with soy sauce for dipping and wasabi paste on the side (optional).

Notes

You could certainly boil or roast beets for this recipe, but pre-cooked baby beets are pretty readily available in the produce section of your grocery and saves a ton of time.
 

Nutrition

Serving: 1roll | Calories: 305kcal | Carbohydrates: 34g | Protein: 6g | Fat: 17g | Saturated Fat: 3g | Sodium: 50mg | Potassium: 694mg | Fiber: 10g | Sugar: 5g | Vitamin A: 301IU | Vitamin C: 14mg | Calcium: 71mg | Iron: 2mg
Tried this recipe?Let us know how it was!

Marinated Chickpea Sushi Roll

Today’s post is #2 in my On A Roll” Series featuring a recipe for a vegan marinated chickpea sushi roll.

In last week’s post I talked about how this project came about. This week let’s take a closer look at homemade sushi making.

Round One

As with any experiment in the kitchen, the first attempt took a decent part of an afternoon but the results were way better than expected. I’m still absolutely PINK about how well my first roll came out – and it was delicious! (Click here for last week’s post)

The creative juices were flowing and I jotted down about 6 vegetarian/vegan sushi roll ideas. Not gonna be modest – they were all awesome and I’m super proud to share them in this ongoing series.

Enjoying the fruits of my labor

You Know You Want To

If you are thinking (like I used to) that sushi is best left to the guys behind the refrigerated fish in the restaurant, I’m challenging you to consider giving it a try.

Honestly, it was way easier than I expected. You can follow my tips since I’m a beginner too, or check out the multitude of YouTube videos.

Improvise

If you don’t have a bamboo mat to roll with, the internet says you can roll with a decent kitchen towel. You will still need plastic wrap which I would say was my least favorite part of this project. Not only was that a little bit tricky, it used up a lot of plastic wrap over the course of making several rolls (I ended up having to rewrap my mat after 2 or 3 rolls but then tried to recycle those pieces to use when slicing).

I’ve decided to try looking for alternative ways to roll without the mat. It appears you can buy non-stick sushi mats on Amazon pretty cheap. Reviews are so-so. If I find a good substitute, you’ll be the first to know.

So if you are ready to get started, or if Tofu Garden Roll didn’t inspire you, maybe Marinated Chickpea Roll will tempt you.

Be sure to subscribe below so you don’t miss any new recipes on Frittata!

Follow Frittata

Marinated Chickpea Roll

A vegan sushi roll featuring cumin-lime marinated chickpeas, cherry tomatoes and cilantro wrapped in quinoa-sushi rice.
Prep Time: 30 minutes
Cook Time: 30 minutes
Total Time: 45 minutes
Course: Main Course
Cuisine: Asian, Vegan, Vegetarian
Keyword: sprouts, sushi, tofu
Servings: 2 rolls
Calories: 470kcal

Equipment

  • sushi mat wrapped in plastic wrap plus extra plastic wrap for cutting

Ingredients

Sushi Quinoa Rice

  • 3/4 cup sushi rice, rinsed several times
  • 1/4 cup uncooked quinoa, rinsed (tri-color is prettiest!)
  • 1 cups water
  • 3 tbsp rice wine vinegar
  • 1 tsp sugar
  • salt
  • 1 tbsp sesame seeds

Marinated Chickpea Filling

  • 1/4 cup extra virgin olive oil
  • 1 lime
  • salt and pepper
  • 1/2 tsp cumin
  • 1/2 serrano pepper, seeded and diced
  • 4 cherry tomatoes, quartered
  • 1/2 can chickpeas, rinsed and drained
  • 2 sheets nori
  • 1/4 cup cilantro, roughly chopped
  • soy sauce for dipping
  • wasabi paste, optional

Instructions

Prepare the Sushi Quinoa Rice

  • Place the rinsed sushi and quinoa in a small saucepan. Add 1 cup water and place over med-high heat. As soon as bubbles start to form on the edges, stir to release anything sticking and cover with a lid. Reduce heat to medium-low. Cook for 15 minutes and then turn off heat (don't open the lid). Allow to steam for another 15 minutes. Remove lid, fluff with fork. Add rice vinegar, sugar, salt and sesame seeds and fluff again. Set aside.

Preparing the Roll

  • While rice is cooking, prepare the marinated chickpeas. In a small mixing bowl whisk together the olive oil and juice of one lime (save one squeeze to finish the roll). Season with salt, pepper and cumin. Add diced serrano pepper, cherry tomatoes and 1/2 can rinsed chickpeas. Mix well. Set aside to marinate.
  • Once rice is done, place one nori sheet (bumpy side up) on a sushi rolling mat that has been wrapped in plastic wrap. Using a fork or wet fingers, press cooked sushi quinoa rice onto the mat firmly leaving 1 inch of nori uncovered.
  • Arrange your chickpea filling on the rice closest to the nori edge that you left without rice. You are going to roll that uncovered nori around the filling to get it started. Add cilantro and a squeeze of lime juice. **You are going to make 2 rolls so use about half your filling ingredients on each.
  • Pick up the edge of your rolling mat and start to flip the exposed piece of nori over the filling ingredients. You essentially want to tuck that piece around and under to get your roll sealed. Use the mat to pull it back towards you, and use your fingers to pinch the roll firmly as you go. You want to get things tight on that first turn and then continue rolling about a half turn at a time, pulling the mat free as you continue to roll forward and continuing to pinch along the length of the roll as you go. Unroll the mat and you should have a beautiful sushi roll!
  • The hardest part IMO is cutting. Move the roll to a cutting board. I use a separate piece of plastic wrap which I lay over the top, pull snug and tuck in slightly all around (some people fully wrap the roll before cutting but I found that left me with shreds of plastic wrap to pick off). Using a serrated knife, gently cut your sushi into pieces and then carefully remove the plastic wrap. Stand back to admire what you've created, then go ahead and make your second roll. Serve immediately or keep wrapped in plastic and refrigerated until ready to serve.
  • Serve 1 roll per person with soy sauce for dipping and wasabi paste on the side (optional).

Notes

If you don’t like having a half can of chickpeas leftover, go ahead and use the entire can and double the rest of the marinade ingredients.  Use the extra chickpeas to make Seared Halloumi Salad with Cumin-Lime Chickpeas, Mint and Pistachios.

Nutrition

Serving: 1roll | Calories: 470kcal | Carbohydrates: 38g | Protein: 9g | Fat: 32g | Saturated Fat: 4g | Sodium: 331mg | Potassium: 273mg | Fiber: 7g | Sugar: 2g | Vitamin A: 322IU | Vitamin C: 5mg | Calcium: 99mg | Iron: 3mg
Tried this recipe?Let us know how it was!

On A Roll – Homemade Sushi

There are two things I’ve never even attempted to make at home: pasta and sushi.

My theory is that someone else has mastered the arts of making these so why should I try to re-invent the wheel and possibly make a mess of it, thus wasting good ingredients and ending up with a mediocre result?

Peer Pressure

My friend Scott texted me this picture last weekend with the caption, “Enjoying your blog, felt inspired!

I was impressed, slightly jealous and tempted to compete. But I’m sticking with store-bought fresh pasta for now.

The gift that didn’t get used

As for making sushi – I have been gifted sushi-making sets more than once. It’s a smart gift – my friends know I love sushi and that I love to make my own food so it seems obvious that I should try making my own sushi.

Alas my lovely boxed sushi sets have gone unused.

Until yesterday.

The Seed Gets Planted

A few weeks ago I got this vegan sushi roll at my farmer’s market. I talked about it in my post that week (Something Worth Waking Up For). A local vendor that makes tempeh had created a tempeh-kimchi sushi roll and I haven’t been able to stop thinking about it.

The problem was it turned out to be a one-time treat. After getting me fully addicted in a single bite, the vendor tells me it isn’t going to be a regular thing.

Anything boys can do….girls can do better!

The following weekend I was spending a lazy afternoon catching up on the YouTube food channels I subscribe to. One of my favorites is Yeung Man Cooking where a guy named Will Yeung makes plant-based Asian dishes and makes it look super easy. I love his style – he doesn’t fill in his recipe demonstrations with unnecessary commentary. It is the ultimate in minimalist video recipe blogging – check it out.

I watched an episode about vegan sushi that covered both how to make proper sushi rice (without a rice maker!) and how to roll. The universe was clearly trying to tell me something. I decided it looked do-able.

Sushi-less sushi?

I got to thinking about vegetarian/vegan sushi rolls – the kimchi was such a unique but obvious ingredient for a roll. The tempeh was a great idea too – provided a good protein punch to make it a hearty lunch.

And then my mind went wild with ideas….marinated chickpeas, fresh herbs, fresh greens, hot peppers….the combinations were endless.

I’ve yet to see a sushi restaurant that really got serious about the vegetarian/vegan customer. You occasionally find a unique fish-free roll but you will most likely be stuck with a cucumber roll or the dreaded cream-cheese roll (I’m fundamentally opposed to cheese in sushi).

Recycled Creations

I got out my sushi mat. I pulled out every partially used-up piece of produce from my fridge, plus every possibly condiment from romesco sauce to olive hummus. I spread it all out and starting grouping things into piles that might work together.

Here’s what happened next:

My very first homemade sushi roll

First thing I learned is that 1 cup of sushi rice doesn’t go very far. It was going to be enough for about 2 rolls total.

I had some leftover cooked tri-color quinoa so I mixed that in with the cooked rice to make it go further. Not only is it healthier, it’s gorgeous!!

Mixing cooked quinoa with sushi rice makes it healthier and more beautiful

And so it begins… this post will officially be the beginning of my Vegetarian Sushi “On A Roll” series. I made 3 different rolls today and have 3 more planned for tomorrow.

I’m not gonna lie, they were all delicious.

Meet Winner #1 – Tofu Garden Roll: Tofu, red bell pepper, radish, shredded carrot and broccoli sprouts with rice vinegar & sesame oil.

Tofu Garden Roll

I’m not sure I’ve ever been more proud of something I made myself.

I have nothing against putting real fish in sushi, I just don’t have access to sushi-grade product. As it turns out, the word “sushi” really refers to meals created around the rice so stay tuned for more fish-free sushi rolls coming soon!

And to be sure you don’t miss any recipes, please subscribe below in the Follow Frittata box.

Follow Frittata

Tofu Garden Roll

A vegan sushi roll featuring tofu and fresh vegetables with sesame oil to finish.
Prep Time: 30 minutes
Cook Time: 30 minutes
Total Time: 45 minutes
Course: Main Course
Cuisine: Asian, Vegan, Vegetarian
Keyword: sprouts, sushi, tofu
Servings: 2 rolls
Calories: 158kcal

Equipment

  • sushi mat wrapped in plastic wrap plus extra plastic wrap for cutting

Ingredients

Sushi Quinoa Rice

  • 3/4 cup sushi rice, rinsed several times
  • 1/4 cup uncooked quinoa, rinsed
  • 1 cup water
  • 3 tbsp rice wine vinegar
  • 1 tsp sugar
  • salt
  • 1 tbsp sesame seeds

Tofu Garden Filling

  • 2 sheets nori
  • 1/2 slice extra firm tofu, drained and cut into 1/4 slices
  • 1/4 red bell pepper, thinly sliced
  • 1 radish, thinly sliced and then cut into matchsticks
  • 2 inch carrot, shredded or cut into matchsticks
  • 1/2 cup broccoli or alfalfa sprouts-yes, 1/2 cup!
  • 1 tsp rice wine vinegar
  • 1/2 tsp toasted sesame oil
  • soy sauce for dipping
  • wasabi paste, optional

Instructions

Prepare the Sushi Quinoa Rice

  • Place the rinsed sushi and quinoa in a small saucepan. Add 1 cup water and place over med-high heat. As soon as bubbles start to form on the edges, stir to release anything sticking and cover with a lid. Reduce heat to medium-low. Cook for 15 minutes and then turn off heat (don't open the lid). Allow to steam for another 15 minutes. Remove lid, fluff with fork. Add rice vinegar, sugar, salt and sesame seeds and fluff again. Set aside.

Preparing the Roll

  • While rice is cooking, prep all your veggies.
  • Once rice is done, place one nori sheet (bumpy side up) on a sushi rolling mat that has been wrapped in plastic wrap. Using a fork or wet fingers, press cooked sushi quinoa rice onto the mat firmly leaving 1 inch of nori uncovered. Carefully pick up the nori and flip over.
  • Starting with the tofu, carefully arrange your filling ingredients on the section of nori where the rice begins on the other side but closest to the nori edge that you left without rice. You are going to roll that uncovered nori around the filling to get it started. Layer the bell pepper, radish, carrots and sprouts. Drizzle 1 tsp of the rice vinegar onto the sprouts. Drizzle 1 tsp sesame oil evenly over to finish. **You are going to make 2 rolls so use about half your filling ingredients on each.
  • Pick up the edge of your rolling mat and start to flip the exposed piece of nori over the filling ingredients. You essentially want to tuck that piece around and under to get your roll sealed. Use the mat to pull it back towards you, and use your fingers to pinch the roll firmly as you go. You want to get things tight on that first turn and then continue rolling about a half turn at a time, pulling the mat free as you continue to roll forward and continuing to pinch along the length of the roll as you go. Unroll the mat and you should have a beautiful sushi roll!
  • The hardest part IMO is cutting. Move the roll to a cutting board. I use a separate piece of plastic wrap which I lay over the top, pull snug and tuck in slightly all around (some people fully wrap the roll before cutting but I found that left me with shreds of plastic wrap to pick off). Using a serrated knife, gently cut your sushi into pieces and then carefully remove the plastic wrap. Stand back to admire what you've created, then go ahead and make your second roll. Serve immediately or keep wrapped in plastic and refrigerated until ready to serve.
  • Serve 1 roll per person with soy sauce for dipping and wasabi paste on the side (optional).

Notes

I’m not sure I’ve ever been more proud of anything I’ve made in my kitchen.  Be patient and go slow when rolling.  Don’t try to put too much filling in.  
Cutting is the hardest part.  I found a serrated knife work best but I do think the plastic wrap trick is a must.

Nutrition

Serving: 1roll | Calories: 158kcal | Carbohydrates: 24g | Protein: 5g | Fat: 4g | Saturated Fat: 1g | Sodium: 36mg | Potassium: 176mg | Fiber: 3g | Sugar: 3g | Vitamin A: 2527IU | Vitamin C: 14mg | Calcium: 65mg | Iron: 1mg
Tried this recipe?Let us know how it was!

Journal of Possibilities

This is an update to my original post from back in January….for those who are still awaiting your opportunity to get vaccinated, here is a little something to look forward to!

Turning the Corner

I’ve got my first dose of the vaccine today.

It left me feeling like I’ve been running a very long race but that I’d suddenly turned the last corner. I can almost see the finish line.

Throughout the pandemic I’ve tried to embrace this break from the daily hustle, from the normal grind. I’ve taken a break from travel planning which often consumes much of my time and keeps me company late into the night.

I spent most of the holidays finishing the destination overview pages for the Travel section of Frittata.

I took my time going through all the photos from previous trips, reviewing my journal and doing internet searches to close the gaps in my memory on certain restaurant names or hotels. It literally felt like I went on an around-the-world trip.

When I finished, I started getting restless thinking about future travel.

I’m grounding myself because I don’t feel like the world is open enough to make it worth spending precious vacation time and money – restaurants are closed, spas are closed, theatres are closed. While it may be a great time to do a naturalist vacation (birds don’t close) I still feel the overall experience is likely to be underwhelming.

My Travel Journal for the past ten years. Now lovingly held together with a rubber band.
Shot of my journal entry for first day in Trinidad, and my permit to enter the Grand Riviere turtle nesting colony. Click the image to jump to Trinidad & Tobago.

But with the finish line starting to come into sight, I decided to dust off my scratch pad of the trips I’m mapping out and to at least “finish” researching some destinations.

Dare to Dream?

I opened up a fresh new journal that I was saving for something special and decided it would be my “future travel” journal…a Journal of Possibilities.

I’ll get my research done on a destination so that I’ve got the key pieces figured out – what time of year to go, how many days needed, key activities or sites, rough idea of where to stay and a rough budget of what it’s going to cost. Then, when I’m ready to book, I can flip through my journal of possibilities and see what hits me.

My Journal of Possibilities
First entry in Journal of Possibilities

I decided to share this with Frittata fans. I’ll build in comment boxes after each destination so hopefully those who have traveled before me can share their tips.

This might become my favorite part of Once Upon a Frittata….click here to visit the Journal of Possibilities.

El Dia de Los Muertos – Day of the Dead Festival
Oaxaca, Mexico

Follow Frittata

Halloumi Cheese….It’s What’s For Dinner

Get ready to fall in love with a new ingredient: halloumi cheese.

Everybody loves cheese, right? But it’s something you put on top of other food for fun. Its not the featured item of your dinner plate – until now.

Meet halloumi cheese – a mixture of goat’s and sheep’s milk, semi-firm, salty goodness.

Find halloumi near feta in most grocery stores

Halloumi is famous for being a cheese you can grill. It has a very high melting point so you can literally treat it like a piece of chicken.

Most recipes using halloumi are simply that – a grilled piece of cheese served as an appetizer.

A lot of the recipes online show it being breaded and then fried (idea for your air fryer if you are playing with that).

My Seared Halloumi Salad with Cumin-Lime Chickpeas, Mint and Pistachios puts the cheese front and center with a supporting side. This is an adaption of a recipe I found in an issue of Food To Love: Flexible Plant-Based Recipes that I picked up at the checkout of Whole Foods. (Great issue, click link to buy it online or Google to buy the digital version even cheaper – sadly it appears the magazine isn’t producing anymore issues.)

Halloumi has a satisfying, salty bite which would be too much on its own so I paired with fresh greens, good olive oil, fresh mint, a little kick from serrano peppers and the crunch of freshly shelled pistachios to balance it out. The cumin-lime chickpeas add tanginess as well as additional healthy protein.

Best part? This impressive dinner salad comes together in about 15 minutes.

Seared Halloumi Salad with Cumin-Lime Chickpeas, Mint and Pistachios

Put salty, squeaky halloumi cheese front and center in this main course salad. The heat from serrano peppers and the cooling flavor of fresh mint elevate this simple ingredient. Cumin-lime chickpeas add healthy protein and tang to round it all out. An impressive dinner salad on the table in less than 15 minutes.
Prep Time: 10 minutes
Cook Time: 5 minutes
Total Time: 15 minutes
Course: Main Course, Salad
Cuisine: Mediterranean
Keyword: chickpeas, halloumi, mint, pistachios
Servings: 2
Calories: 1007kcal

Ingredients

Cumin-Lime Chickpeas

  • 1/2 cup extra virgin olive oil
  • 2 tbsp lime juice
  • 1/2 tsp cumin
  • salt and pepper
  • 1/2 serrano pepper, seeded and diced
  • 1/2 shallot, thinly sliced
  • 1/2 can chickpeas, rinsed and drained
  • 10 cherry tomatoes, halved

Halloumi Salad

  • 2 cups mixed greens (I use arugula and kale)
  • 1 avocado, sliced
  • 4-6 slices halloumi cheese (1/4 inch thick)
  • cooking spray
  • 1/4 cup fresh shelled pistachios, roughly chopped
  • 1/4 cup fresh mint leaves, roughly chopped
  • extra virgin olive oil to finish

Instructions

Make the cumin-lime chickpeas

  • In a medium bowl, whisk together the olive oil, lime juice and cumin. Season well with salt and pepper. Add the diced serrano (throw in a few seeds for extra heat), the chickpeas and the halved cherry tomatoes. Stir to combine and set aside to marinate while you prepare the halloumi salad.

Assemble the salald

  • Heat a cast iron grill pan over med-high heat. Make sure it is nice and hot. Spray generously with cooking spray. Add the halloumi slices and sear for about 2.5 minutes per side or until you have nice grill marks.
  • Meanwhile, divide the greens between two large salad bowls. Divide the avocado slices between each bowl. Place the chickpeas in the middle, dividing between the two bowls.
  • Place half of the halloumi on top of chickpeas. Sprinkle with mint and pistachios. Finish with a drizzle of olive oil.

Notes

If you are looking for main course dinner salads, look no further.  This is a unique idea that is easy but impressive.  
Salty and firm halloumi cheese is complimented by the heat of serrano chili peppers and the cooling flavor of fresh mint.  Tangy cumin-lime chickpeas and cherry tomatoes round it out.  
The serrano (or jalapeno) and mint are crucial to this recipe.  It is a go-to for me when I see that mint has made a run in my garden.  
Warming up the pistachios in a dry pan for a few minutes adds even more to the flavor but its totally optional.


Nutrition

Serving: 1.5cups | Calories: 1007kcal | Carbohydrates: 33g | Protein: 18g | Fat: 93g | Saturated Fat: 17g | Sodium: 693mg | Potassium: 954mg | Fiber: 14g | Sugar: 3g | Vitamin A: 816IU | Vitamin C: 21mg | Calcium: 415mg | Iron: 4mg
Tried this recipe?Let us know how it was!

FollowFrittata

Bacon and Avocado Sandwich

At Once Upon A Frittata, the goal is to inspire you to get in the kitchen. That doesn’t always mean fancy meals with long ingredient lists. Simple sandwiches count as cooking too!

I love sandwiches. Period.

I have a few favorite sandwich breads – the ones that I can’t resist buying when I see them on the shelf and that I then bring home and pretty much immediately use to make a sandwich.

I love anything I can put on Pepperidge Farm’s Jewish Pumpernickel “Dark Pump”, like this Bacon and Avocado Sandwich. Second in line is Pepperidge Farm’s Jewish Seeded Rye or Deli Swirl Dark Rye & Pump which I use for my Pesto, Hummus and Cheese sandwich.

I was about to add the very simple tuna and broccoli sprout sandwich to the list of things that go perfectly on these breads but I just devoured the sandwich before I remembered to take the picture.

If you can’t find these breads in your own grocery store, you can buy a 2-loaf pack on Amazon by clicking the links above. I will make about 1 penny if you go that route 🙂

Bacon and Avocado Sandwich

One of my favorite easy weekend sandwiches.
Prep Time: 10 minutes
Total Time: 10 minutes
Course: Lunch
Keyword: avocado, bacon, sandwich
Servings: 1
Calories: 583kcal

Ingredients

  • 4 slices bacon
  • 2 slices dark pumpernickel bread
  • 1 tbsp mayonnaise
  • 1 avocado, sliced

Instructions

  • Cook bacon to your preferred crispiness and drain on paper towels.
  • Meanwhile, lightly toast the pumpernickel slices.
  • Spread the mayo on first, then avocado, then warm bacon.

Notes

This sandwich is great on marbled or Jewish rye too!  If it’s summer, add a slice of garden-ripe tomato.

Nutrition

Serving: 1sandwich | Calories: 583kcal | Carbohydrates: 42g | Protein: 9g | Fat: 46g | Saturated Fat: 8g | Trans Fat: 1g | Cholesterol: 10mg | Sodium: 419mg | Potassium: 1086mg | Fiber: 17g | Sugar: 2g | Vitamin A: 303IU | Vitamin C: 20mg | Calcium: 61mg | Iron: 3mg
Tried this recipe?Let us know how it was!